The lighting system of vehicles, including the headlights, is particularly important in ensuring safe driving. Although most headlights are made of durable and scratch-resistant polycarbonate plastic, their degradation is unavoidable
Your car’s headlights will degrade and cloud over due to UV rays from the sunlight, the pollution or the oxidation over time.
Therefore, cleaning the dim headlights is necessary. Here’re the steps to refresh your headlights so they shine like new.
Preparation:
- Headlight restoration kits (Mequiar’s or Turtle Wax…)
- Car wash
- Polish
- Tissue/Soft cloth
- Masking tape
- Polishing aids: sandpaper, drill.
Instruction:
Step 1: Firstly, you need to wash your headlight’s surface by soap (or car wash) and water to remove dust and dirt. Then wait for the surface to dry.
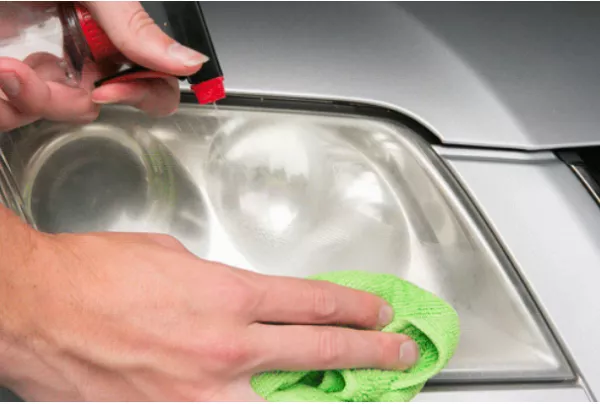
Wash your headlight’s surface by soap and water to remove dust and dirt.
Step 2: Mask the area around the headlamp that needs cleaning with a masking tape.
According to car maintenance experts, this step is very important to ensure the paint around the headlights will not come in contact with the liquid or the sandpaper.
Afterward, apply headlight restoration liquid to the headlight’s surface before sanding.
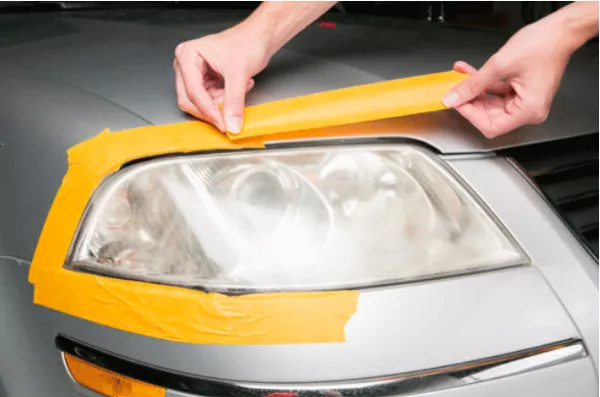
Mask the area around the headlamp
Note: Carefully read the instructions of headlight restoration liquid because some liquids don’t require sanding at step 3 and 4 below.
Step 3: Sandpapers with different grit sizes are always enclosed with the headlight restoration kits. Wet a piece of 1,000-grit sandpaper to scuff away the outer layer of haze and then lightly sand the lens in horizontal directions.
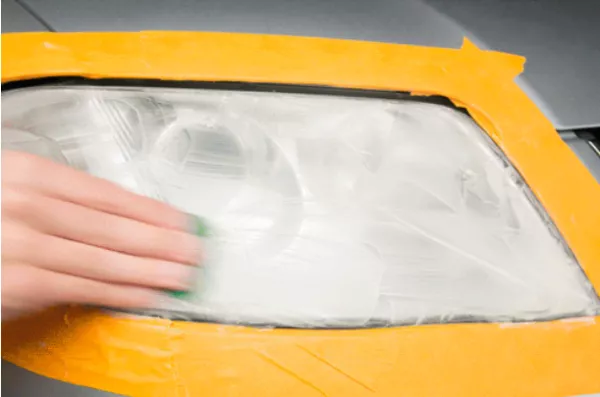
Wet a piece of 1,000-grit sandpaper to scuff away the outer layer of haze.
Be careful because this is the most important step. You must sand back and forth in one direction and always keep the sandpaper and the lens surface wet while sanding.
>>> Must read: A short guide to LED car headlights: Basic parts, types, price & more
Step 4: Continue to keep the sandpaper and the lens surface wet but this time, we use a piece of 2,000-grit sandpaper and lightly sand vertically.
Step 4: Continue to keep the sandpaper and the lens surface wet but this time, we use a piece of 2,000-grit sandpaper and lightly sand vertically.
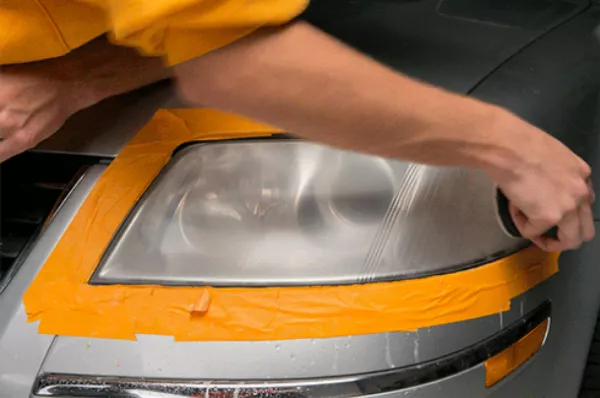
Use a piece of 2,000-grit sandpaper and lightly sand vertically.
These two steps will take you around 10 to 30 minutes; this depends on the haze of the headlights.
Step 5: Dry lens surface with a tissue or soft cloth
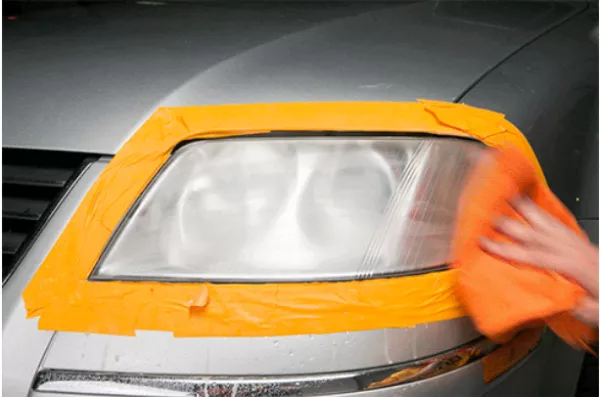
Dry lens surface with a tissue or soft cloth
Step 6: Apply the polish to a sponge attached to the drill bit then rub on the headlight’s surface.
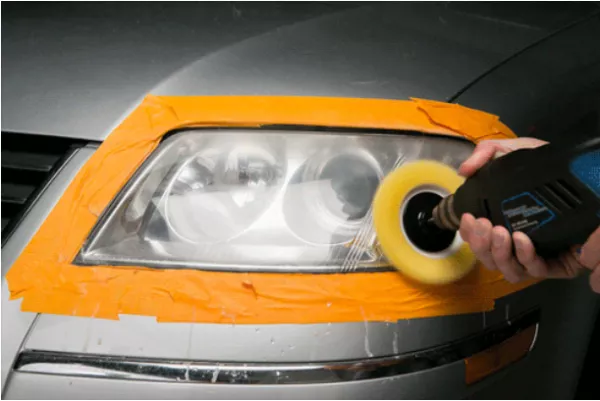
Apply the polish to a sponge attached to the drill bit then rub on the headlight’s surface.
You will see clearly the change of your headlight after finishing this step.
Step 7: Dry the headlight’s surface with a tissue or soft cloth again.
Step 8: Apply UV sealant to the lens surface.
Step 7: Dry the headlight’s surface with a tissue or soft cloth again.
Step 8: Apply UV sealant to the lens surface.
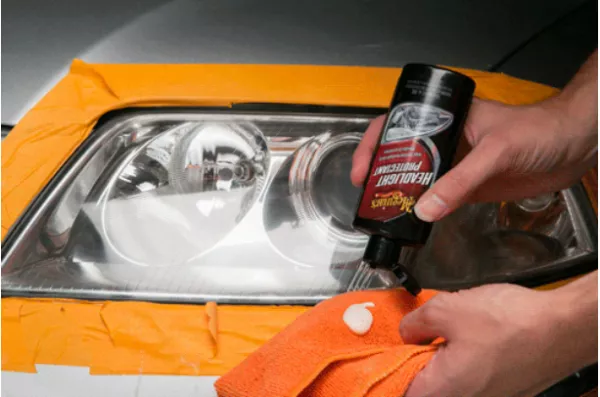
Apply UV sealant to the lens surface
Because the sanding step removes the original protective layer of the headlight, if you don't reapply that shield, your headlights will haze over again in a few weeks.
Finished! Wait for several hours and you will see your headlights shine again.
Many car maintenance experts believe this refreshing work is applied not only to the headlights but also to the rear lights and the fog lamps as well. However, this work should not be carried out on the car’s windows.
Finished! Wait for several hours and you will see your headlights shine again.
Many car maintenance experts believe this refreshing work is applied not only to the headlights but also to the rear lights and the fog lamps as well. However, this work should not be carried out on the car’s windows.
Car maintenance
make your headlights shine like new
lighting system
safe driving
car wash
headlight restoration liquid
headlight restoration kits
