Every single part that makes up your vehicle is important and requires dedicated care and attention. Keeping a good check on them every once in awhile assures you that they’re in tip-top shape and that you won’t have to worry about having a vehicle malfunction on your next drive. But how sure are you that you’re checking on all the right parts?
Do you check the engine, the tires, and all the lights? What about the serpentine belt? Do you know where it is and what it should look like? Find out everything you need to know about the serpentine belt by reading this article from Philkotse.com.
1. What is a serpentine belt?
The serpentine belt is a long, snake-like belt that keeps most of your important vehicle components running. These components include the power-steering pump, the air condition, the alternator and sometimes, the water pump too.
Before the single belt was invented, four-wheeled vehicles used to have several serpentine belts. Each of these belts was controlling individual, different components.
However, this quickly went out of fashion because these belts caused inconsistency and even compromised the performance of the vehicle. That’s where the idea of the single serpentine belt came to light.
>>> Related: Serpentine vs Timing Belt: What are the functions and differences?
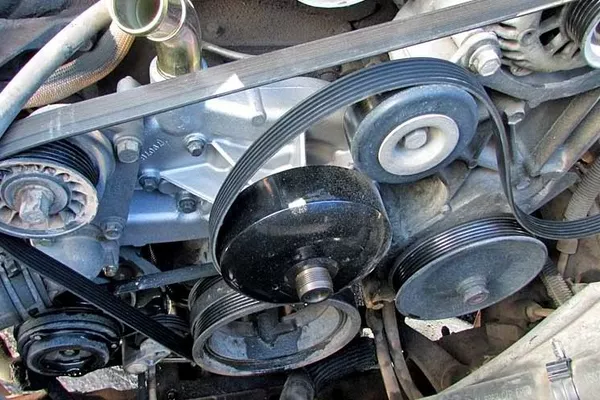
The serpentine belt is a long, snake-like belt that keeps most of your important vehicle components running
2. Inspecting a serpentine belt
Inspecting your car’s serpentine belt isn’t like inspecting any other exterior part where a plain visual inspection is enough. If you’re not familiar with the serpentine belt, you bets follow our tips below:
>>> Read more: 4 essential things you need to know when maintaining car belts.
3. Locating the serpentine belt
Step 1. Unlock the hood
Pop the hood to gain access to the engine compartment. This can be easily done by tugging at the hood release switch that you can find next to the driver’s seat.
Step 2. Disconnect your car's battery
Whether you’re checking the serpentine belt or not, always remember to disconnect the battery if you have an automotive project –especially if it’s focused on the engine parts. Using a wrench with the appropriate size, loosen the nut that’s keeping the black ground cable in place on the negative terminal of your car’s battery.
After that, just tuck the negative terminal to the side of the battery. Don’t bother undoing the red cable. For this project, disconnecting the negative terminal is enough.
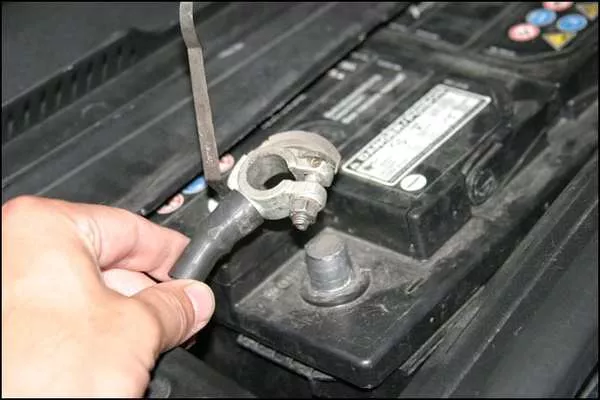
Always remember to disconnect the battery if you have an automotive project –especially on the engine parts
Step 3. Find the serpentine belt
The location of the serpentine belt may vary depending on the location of the engine on your vehicle. If your car has its engine at the front, be prepared to look there. If you found the engine but not the serpentine belt, there could be protective coverings that are hindering your view.
The covers that protect serpentine belts are usually made of plastic. So, you need to be careful when removing them. If you can’t find the serpentine belt on your vehicle, simply refer to your owner’s manual.
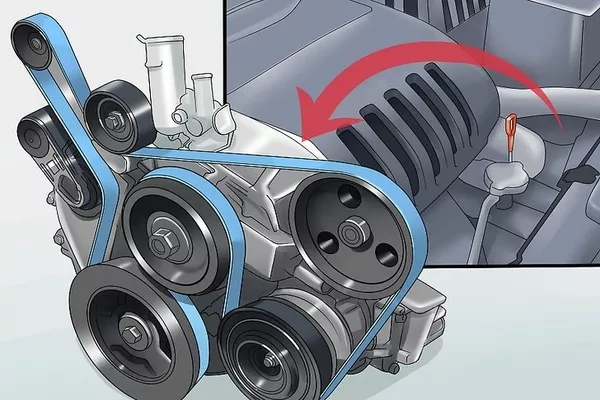
The location of the serpentine belt may vary depending on the location of the engine
>>> Also check: Drive belts - What you have not known and what you need to follow.
Step 4. Inspect the serpentine belt
Once you found the serpentine belt, inspect it visually to check if there are obvious signs of wear and damage. If you notice that the belt has cracks, wear marks or other indications that there has been too much friction, you will need to have it replaced. It is usually easy to tell if the time has come to replace your serpentine belt.
They tend to have visible signs of damage that aren’t that hard to find. If there are visible signs that the belt has been rubbing on to anything, make sure that you find out and address whatever part it was that it was rubbing on. This will prevent the new belt from being damaged once you’ve installed it.
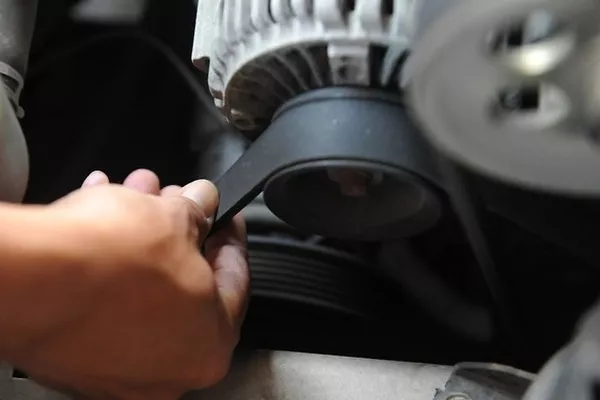
Inspect it visually to check if there are obvious signs of wear and damage
>>> Related: Drive belt vs timing belt: What are the differences?
4. Replacing the serpentine belt
Now that you’re sure that your serpentine needs to be replaced, it’s now time to replace it.
Step 1. Find your car's serpentine belt routing diagram
Almost all of the released vehicles in the market come with an informative sticker that’s located in the engine bay. This sticker shows the direction that the serpentine belt works and how it routes through the different pulleys of the engine. If your car doesn’t have this particular sticker, you would need to find out your serpentine’s belt route another way.
How to Replace a Serpentine Belt
You can use your owner’s manual for this or utilize the internet. Simply open your browser and type in your vehicle’s specific make, model and year with the words “serpentine belt route diagram” after. For a quicker solution, you can just snap a photo as a reference.
>>> You might want to know: Replacing the accessory drive belt.
Step 2. Remove the old belt
Relieve the tension from the belt and carefully remove it from the pulley where it’s laid on. Then, remove it from the rest of the pulleys without causing more damage to it. If the serpentine belt has parts that have come off due to extreme damage, make sure to remove all of those from the pulleys to avoid causing problems to the new serpentine belt.
Step 3. Compare the Old Belt to Your New One
Bring your old serpentine belt to the new one and take a close look at the differences between the two. They should still have the same width as well as the same number of ribs that are laid on the belt in a horizontal direction. Your used belt may look longer than your new one because of the prolonged stretching motion.
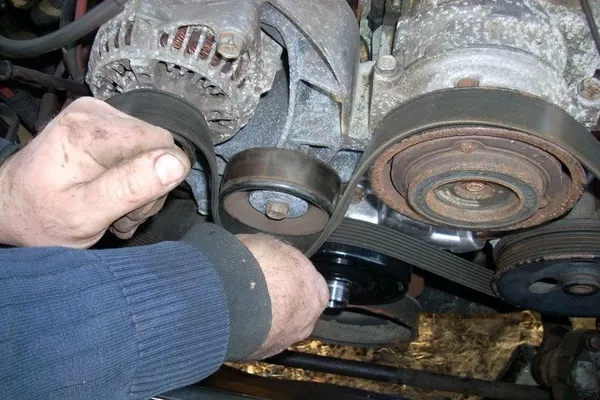
Remove it from the rest of the pulleys without causing more damage to it
However, if your new belt is not the same width as your old one, you may have gotten a wrong belt. Also, try to inspect the newly-bought belt just to make sure that there are no factory defects that can give you problems in the long run.
>>> FYI: How does a timing belt in your car engine work?
Step 4. Put the serpentine belt in the old belt’s place
If you remember how the old belt was placed, you can simply route the new one through the correct pulleys. Your new belt should be routed all around the pulleys. If it’s loose, you may have either routed it incorrectly or the belt you got has the wrong size.
After that, you simply have to let your vehicle’s auto-tensioner do its job and you should be good to go.
Recent posts
- Can you mix different types of car antifreeze together? Aug 17, 2022
- 7 things need to know when taking care of your power steering system Mar 09, 2021
- 12 myths and facts about engine oil that you should know Aug 09, 2022
- Engine oil myths and what to do when oil leaks happen Aug 17, 2022
- Drive belts - What you have not known and what you need to follow Aug 17, 2022


