Your alternator is a vital part of your engine, if it’s not in tip-top shape, then your car is bound to be the stressor of your day. If you don’t want to pay to have it tested or checked out, you can always do it yourself.
Check out the complete guide prepared by Philkotse.com on how you can check your alternator without an expert’s help.
1. What you need for preparation
Step 1. Find a dedicated place
Remember that anything you do with your car may result in an accident, especially if it involves the parts in the engine compartment as well as other big bulky parts of your car. That’s why it’s important that you have a dedicated garage for this. If you don’t have a garage, any wide-spaced, well-lit area will do.
It should be fine as long as it’s not on the side of the road or an area where other people, children, and pets are around. They might trip over your tools, get electrocuted, lose the screws that you removed from the vehicle or even swallow them.
This is a very important step that you should remember every time you do a repair, a check-up or a maintenance procedure on your vehicle.

It’s important that you have a dedicated garage for the job
Step 2. Wear protective gear
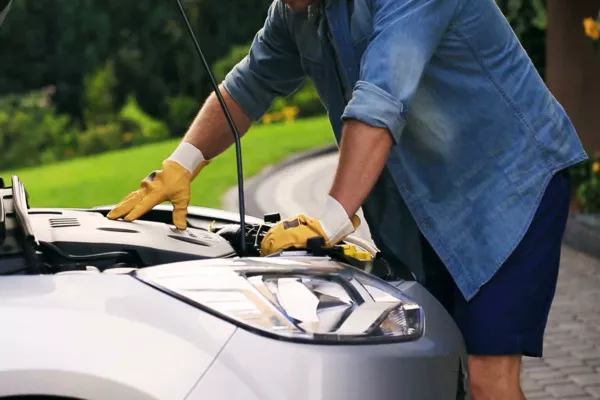
Once you find a good spot, make sure you keep yourself protected. Use a pair of dependable gloves that you can buy at the auto-supplies store. These are usually made by manufacturers with the safety of auto-mechanics in mind, which is basically what you’re trying to be right now – your own auto-mechanic.
A good pair will usually protect you from both dirt, grime and car fluids that are not safe for the skin, as well as minor electric charges. Then, put on some hard goggles. These will protect your eyes from materials that can come flying out of your car while you’re attempting to check your alternator.

Use a pair of dependable gloves that you can buy at the auto-supplies store
>>> Related: How long do alternators last? When and how to have them replaced?
Step 3. Gather your tools
Don’t forget to get your tools, but only the ones that are necessary for this procedure. Put them on a table or a tray that has wheels so you can get them close to you whatever you do. It will also help if you keep them laid out rather than stacked together.
Keeping your necessary tools within your reach will make sure that you won’t leave the work area and leave it accessible to kids, pets and other people who may tinker with your things and your work.

Don’t forget to get your tools, but only the ones that are necessary for this procedure
Once you’re all set up you can proceed with the steps below on how to properly check your alternator.
>>> Also check: Essential tools needed in a car tool kit for DIY car maintenance.
2. How to check the car alternator
Step 1. Get yourself a voltmeter
One of the things that you’d require for this job is a voltmeter and a pretty accurate one. You can find one in your nearest hardware or auto supplies store, but you can use the one you already have if you have one at home.
If you don’t have a voltage meter at home but have a multimeter instead, you can use that and skip the voltmeter purchase. A multimeter can measure voltage including other electrical elements like resistance and current. What we’ll be doing is checking the voltage, so if you only have a multimeter available, that should also get the job done.
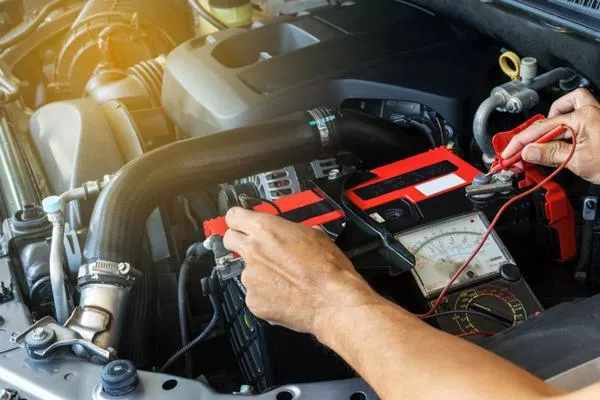
How to test an alternator
Step 2. Check your car’s battery
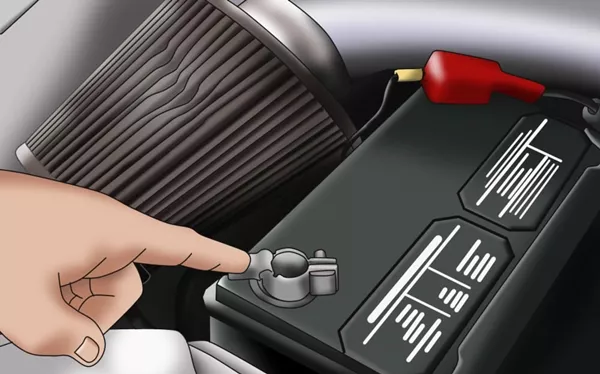
Your car battery is a necessary element when you start your vehicle. When you attempt to start the engine, the alternator spins at a reasonable speed so your car battery is kept charged. To put it simply, if your battery power is too low, then you will be unable to get your engine started.
If that’s the case, then you won’t be able to make the alternator spin and the whole point of checking it with a voltmeter or multimeter would be useless.
If you’re checking the alternator because there is a problem with your car, then checking your battery may be a good idea as well. In some cases, the battery is old or it’s because the weather is too cold that’s why the car isn’t starting. This is how you do it.
- Turn your car off.
- Pop the hood and rest it on its respective stand.
- Connect your voltmeter to the battery. Take the red lead that leads to the voltmeter and attaches this to the positive terminal of your car battery. Do the same for the black lead and the negative terminal. Make sure you don’t make skin contact with the battery.
- Look at the voltmeter’s readings. If the readings show results above 12.2 volts, it has enough power to make the alternator spin. If the voltmeter shows results less than that, then the battery may be your problem and not the alternator. You can have it recharged or use another battery to conduct the alternator check-up.
>>> Related: How to test an alternator without a multimeter

Your car battery is a necessary element when you start your vehicle
Step 3. Start your engine
Start your vehicle and rev it all the way up to 2,000 RPM. This will send power rushing to your battery and should cause the voltage regulator to snap the alternator to high gear.
>>> Worth your attention: Will a dead and dying battery destroy your cars’ alternator?
Step 4. Retest the battery
If your car battery was just a little above 12 volts the first time you tested it, it should now go up to 13 volts at least. Try and get someone to rev the vehicle for you while you’re checking the alternator. Have them rev the engine at various speeds and lengths.

Try and get someone to rev the vehicle for you while you’re checking the alternator
If your alternator fluctuates from 14 to 14.5 volts, then your alternator must be in good shape. On the other hand, if your voltage remains the same or even decreases instead of rising, then your alternator must be broken.
You may also need to repeat this process but with the radio, AC and lights turned on. The alternator will remain to charge as long as the battery stays above 13 volts while the engine is rolling at 2,000 rotations per minute with all its accessories turned on.
Step 5. Listen to the alternator
While your repair buddy revs up the engine, try standing close to the radiator and just listen to it. If there is anything wrong with the bearings, you will hear a squealing sound that will originate from the front of your vehicle. This will grow louder as more electrical accessories utilize power from the battery at the same time.
Recent posts
- Car maintenance: 5 simple steps to install camshaft of your car engine Aug 17, 2022
- A guide with 4 DIY steps to deal with car radiator leak Aug 17, 2022
- Basic care tips for car radiator that every driver should know Aug 17, 2022
- Dealing with Faulty Fan Belts and Their Squeaking Sound Dec 29, 2020
- 10 bad car noises Filipino drivers should look out for Mar 16, 2021


