There are many reasons why the rearview mirror in the car falls down, such as in car accident, under strong impact of a head-on collision, by excessive twisting force, due to the effect of solar heat, or under prolonged shaking.
If the vehicle's rearview mirror falls off and break, the thing to do is to handle it immediately because the rear view of the vehicle will be severely affected. In fact, the car owner can install back the rearview mirror easily with a few simple steps and tools. And because of the simplicity of this action, many technicians even agree to install the part for free.
Before rolling up your shirtsleeves to install a new rearview mirror for your car, let Philkotse.com give you a list of necessary tools and equipment for this work:
- Specialized tools for installing rearview mirror;
- Tools for cleaning mirrors and glass;
- Razors
- Dryer
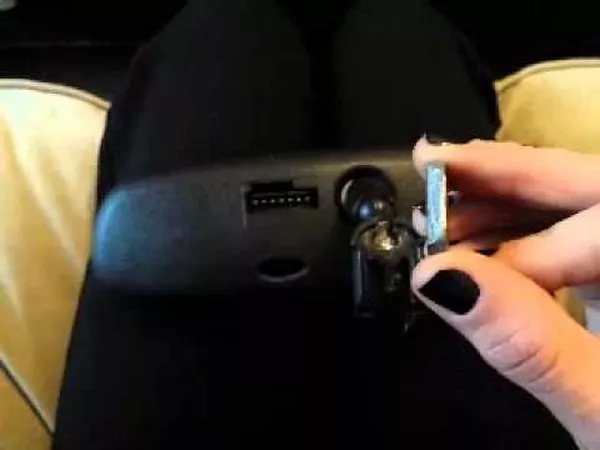
Step 1: Remove the mounting button from the rearview mirror
This is a key component to attach the mirror to the windshield. Removal of this button is simple because the windscreen is usually connected to the mirror by a slide or hook mechanism through the arm of the mirror.

Remove the mounting button from the rearview mirror
Step 2: Heat up a windscreen’s area on which the mirror is previously attached
This step is to ensure that the area for mirror installation is warm enough to have an effect on the glue we are about to apply. If the windshield is cold, the adhesive effect of the glue on the glass will be reduced. This step can be done by using a hair dryer to heat up.
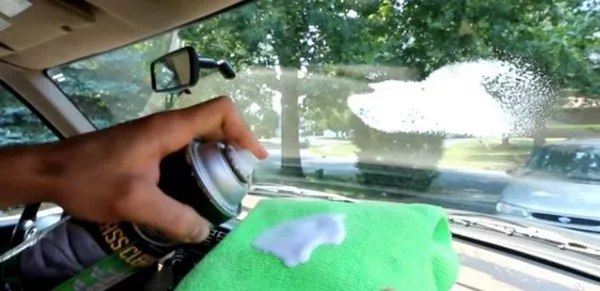
Step 3: Clean the windshield and remove any old stains
Before installing the rearview mirror, make sure the windscreen surface is completely clean. If there is any old glue left on the glass, try to use a razor to clean it carefully. When cleaning all glue residues completely, use a glass cleaning fluid or alcohol to clean again the inside surface of the windshield and the bottom of the mirror arm that will come in contact with the glass.
When handling, do not leave behind fingerprint or let your finger touch the windscreen because there will be oil or water on your hands.

Clean the windshield and remove any old stains
Step 4: Determine the correct position of the mirror
In the case of an old car model, the owner can use a small piece of stickers to mark from the outside of the windscreen to determine exactly where the mirror should be placed inside.
These days, many new vehicles are pre-marked on the outside of the glass, indicating the position of the rear-view mirror, which is very convenient.
Step 5: Apply a specialized glue for the mirror (apply a rearview mirror activator)
After cleaning and identifying the position of the mirror, apply a special adhesive for the mirror onto the inner surface of the windshield and the surface of the bracket and allow it to dry for a few minutes.
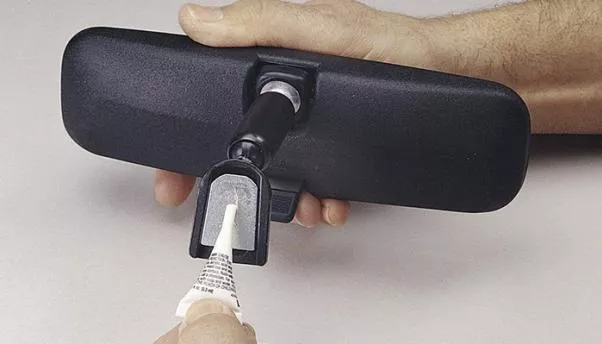
Step 6: Apply the glue to the mirror mount
You should apply the glue onto the mirror mount instead of the windscreen. Firmly attach the mirror mount to the windshield and apply a steady force to keep it in place for more than 60 seconds until the mount is firmly attached.

Apply the glue to the mirror mount
Step 7: Reconnect the mirror to the mirror mount (as shown in step 1)
You should wait for more than 5 minutes for the mirror mount to firmly attach to the windshield and then attach the mirror neck to the joint (this step should follow the instructions from the manufacturer of the car because each design is different).
>>> Click to get more helpful tips and advice for all car owners
Recent posts
- Best dash cam Philippines: 5 features to consider & 5 recommended products Aug 26, 2022
- What fancy high-tech car features should be prioritized? Nov 24, 2018
- How to adjust rear-view mirrors for a safe drive Jul 06, 2018
- Best features for optimizing a dashcam Dec 25, 2020


