After years of driving your car, you will notice that its braking system tends to change. Situations like you would now step harder for a small amount of braking power and your car tends to move downhill even when the parking brake is engaged.
The probable reason why these happen is your drum brakes need to be adjusted. Most rear wheels of cars come with a drum brake, while the front comes with a disc brake. Disc brakes are theoretically better than drum brakes but are more expensive. As such, only the rear wheels are installed with a drum brake to save production costs.
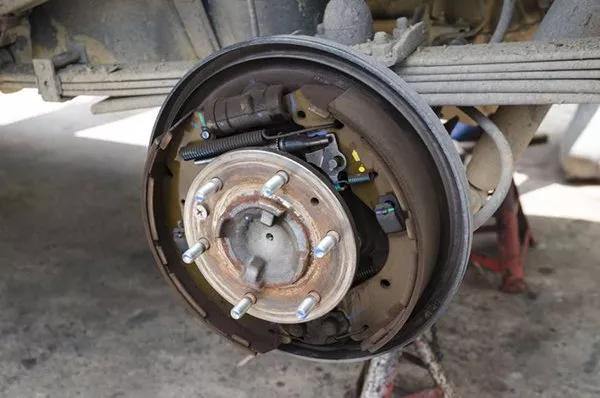
This is what a drum brake assembly looks like
If you are experiencing situations where you step on the brakes but the power is not sufficient enough or when you pull the parking brake higher than usual, then your drum brakes probably need to be adjusted. So with that being said, here are 7 steps you can do to adjust your drum brakes.
1. Prepare the tools
You won’t need a team or numerous amounts of tools to adjust your drum brakes. Have with you at least a hammer, a brake cleaner, two screwdrivers, jack and jack stands, rags, socket set, a mask, and torque wrench. Be sure that the parking brake is set.
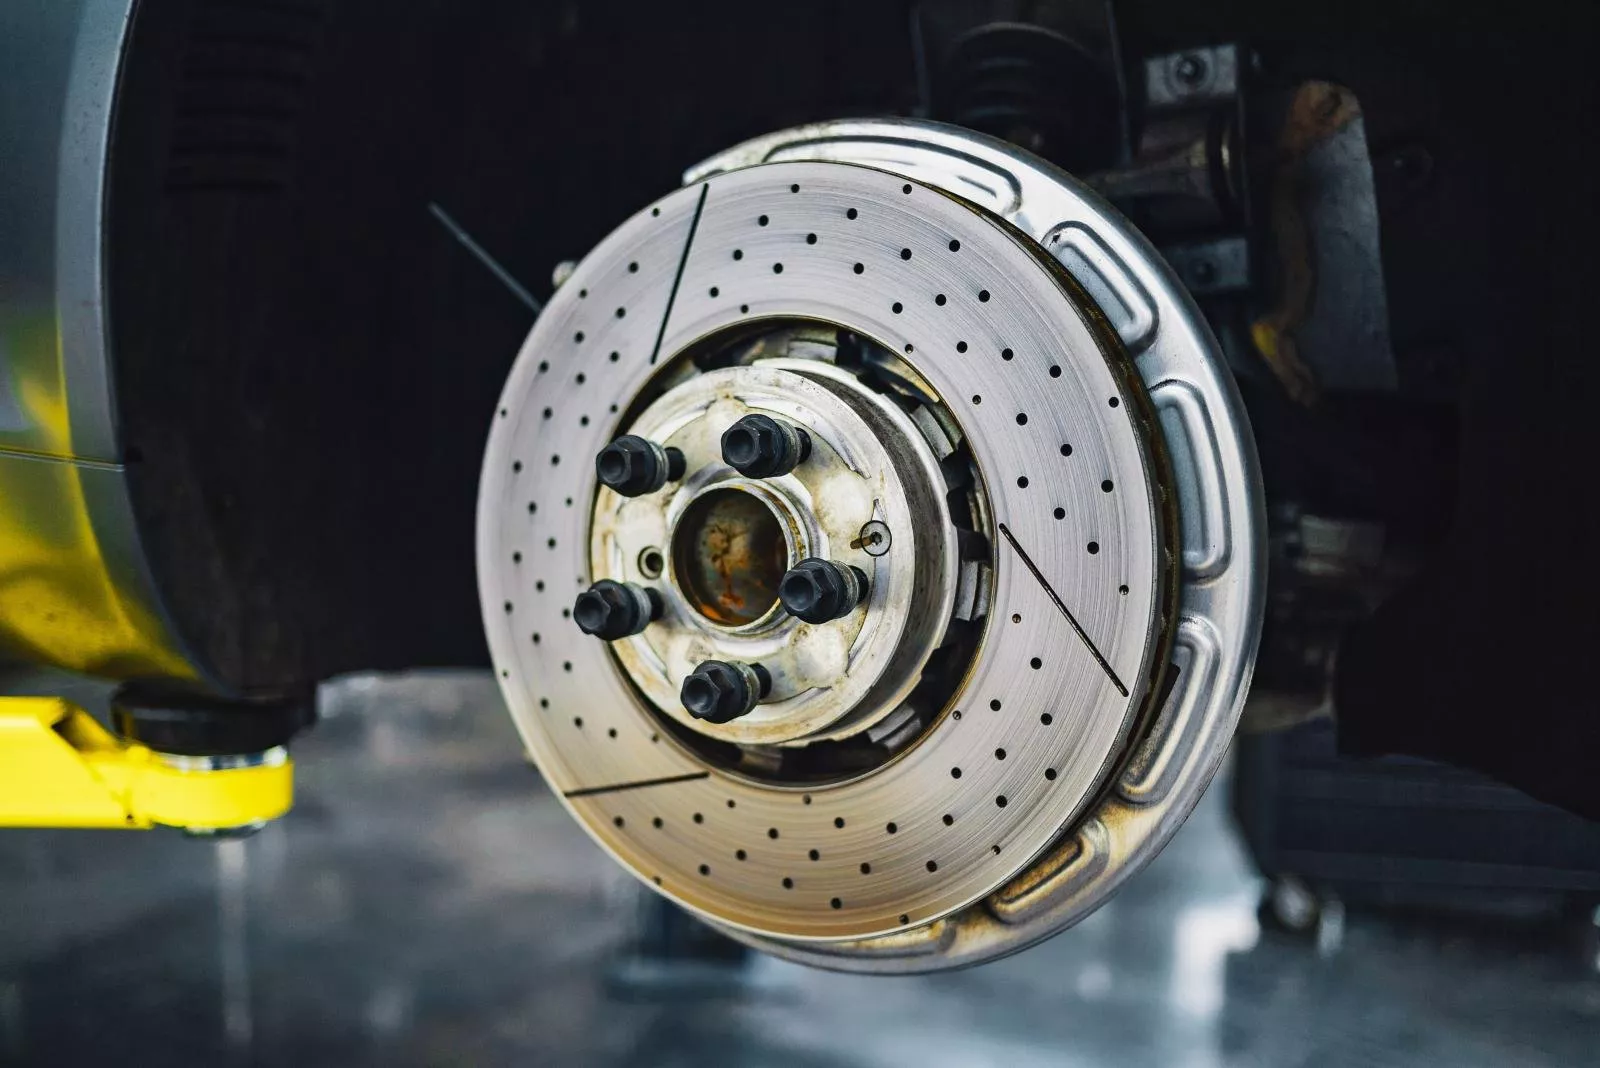
On the contrary, this is a disc brake
The mask is a must-have as drum brakes can release particles from strong braking applications that can be dangerous once inhaled. We also recommend that you work inside a garage to avoid dust from entering your drum brake after you reassembled it back.
2. Lift the car
Working against the weight of the car is never a good idea. As such, use a jack to lift at least the rear of the car since drum brakes are usually installed at the rear only. After lifting an area of your car, place a jack stand so you can repeat the same process to other areas of the car.
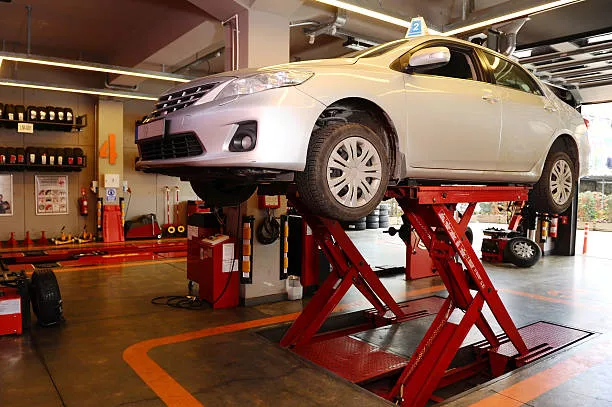
You can also use a car lift for a safer drum brake adjustment
It is ideal to put at least three jack stands for your car. One on the rear, and one on each side of the car. This way, you can work on both of the drum brakes of the rear of your car. If this is your first time jacking your car up, you might want to ask for a helping hand.
3. Remove the wheels and drum brake
Unbolt the lug nuts of your rear wheels. To make it easier for you to install the wheels back, put the removed lug nuts in a container. This way, you can work on your drum brakes in a more organized fashion. Plus, losing a lug nut can be a hassle so might as well store them in a container.
After removing the wheels, remove the drum brake next. You can just pull the drum brake off its assembly easily. However, rusts and dirt can form over time in your drum brake so you might want to use a hammer to shake these off. Try to not hit the bolts and hit only in between the areas of the bolts.
4. Examine the brake linings first
There could be other reasons why your braking system doesn’t produce as much power that you need. It could be that the brake linings, or brake shoes, need to be replaced. The brake linings are the outer part of the assembly that touches the drum brake when the brakes are pressed.
How to Clean and Adjust Rear Drum Brakes
If the brake linings are still beyond three millimeters, then you might want to examine other brake parts as well such as the dust boots, springs, and levers. Once all the brake parts are still in working condition, then you can now proceed to adjust your drum brake.
>>> Related: 4 rules that every Filipino driver should know about braking
5. Adjust the star wheel
The star wheel adjuster looks like a small gear. Some mechanics would say that you shouldn’t adjust your star wheel since it automatically adjusts itself to the proper allowance. But if you feel like you should get your hands on it, then grab a pair of screwdrivers to get started.
To tighten the adjustment, spin the star wheel in the direction of the gear. Give it at least three spins then place the drum brake back. Rotate the drum brake using your hand only. It shouldn’t be too tight and it shouldn’t rotate easily as well. If you think that you have tightened the star wheel too much, press on the lever using one screwdriver in the back of the star wheel and start spinning it in the opposite direction using another screwdriver.
6. Clean the assembly
After achieving your desired results, you can now start cleaning the assembly. Use a brake cleaner to get the best results. Spray on the assembly and the drum brake and wipe it off using a rag. You should wait at least ten minutes to completely dry the parts off before putting the drum break back.

Never become complacent when dealing with your car's braking system
With a clean assembly, the braking power should be stronger as dust and dirt refrain your brake lining and drum brake from having optimum contact. A can of brake cleaner is not that expensive you might want to stock at least one or two in your garage.
>>> Related: What are brake pads made of and what’s the best material?
7. Go for a test drive
To finish the adjustment off, grab the container where you stored your lug nuts. We recommend that you use a torque wrench and follow the manufacturer’s specified torque value so your wheels are installed tightly and correctly.

Be sure that you now got a better braking performance before heading out to the streets
Now you can go out for a test drive. Since you have adjusted the drum brakes, you should feel that the braking system delivers more power. The parking brake should also be set lower as compared to before adjusting your drum brakes.
How to adjust drum brake: FAQs
Q: What is a drum brake?
A drum brake is a type of braking mechanism that uses friction between linings and the drum to stop a vehicle.
Q: Which is better, a drum brake or disc brake?
Generally, disc brakes are always better than drum brakes due to better heat dissipation and easier to replace.
Q: Are disc brakes more expensive than drum brakes?
Yes, disc brakes are more expensive than drum brakes. As such, most entry-level cars come with a drum brake.
Q: Why do cars come with drum brakes at the back only?
The braking power should always be stronger in the front wheels. That’s why you would usually notice that cars come with disc brakes upfront and drum brakes at the back.
Q: How long do drum brakes last?
Drum brakes are designed to last for a very long time. You can expect to replace your drum brakes every 230,000 kilometers.
Here at Philkotse.com, we value your interest in the automotive industry. Visit our website to find out more.
Recent posts
- Drilled and Slotted Brake Rotors Dec 31, 2020
- brake fade after flood Mar 01, 2021
- 7 steps to deal with the car brake noise Nov 30, 2022
- 6 signs showing that your car's brake system needs maintence Mar 17, 2021
- Everything You Need To Know About Brake Fluid Aug 17, 2022


