Checking the car battery’s water levels is an important maintenance procedure that every car owner must learn; this is vital to keeping your battery in good shape. Failing to monitor the health of your battery and promptly address problems can result in unnecessary expenses.
Philkotse.com lists down the steps in making sure that your battery levels are at the desired levels.
Step 1. Locate your car’s battery
Most manufacturers place the battery right in the engine bay under the hood. For brands such as BMW or Mercedes-Benz, you may need to check the isolated compartment in the trunk. In some Cadillac models, the battery is located under the rear seat.
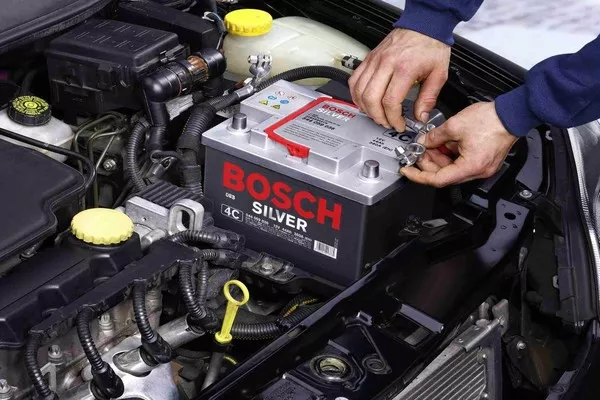
You can usually find the battery right inside the engine bay
>>> Worth reading: 7 factors that affect your car's battery life expectancy.
Step 2. Cleaning your battery
Once you find the battery, clean it first by removing the accumulated dirt and debris, both on the battery terminals and the body itself. Aside from making it more efficient for the battery to conduct power through the terminals, cleaning also reduces the risk of foreign material entering the battery cells.
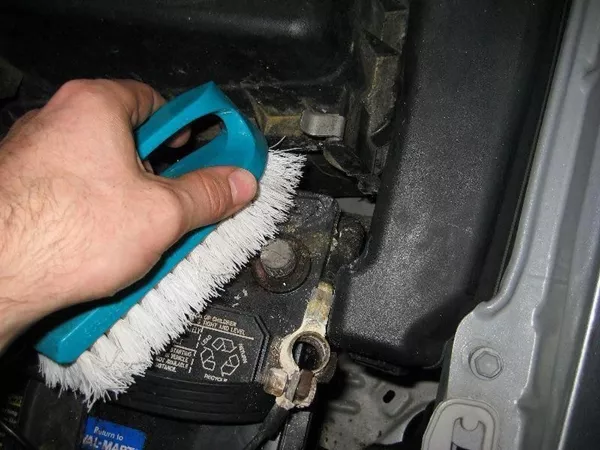
Once you find the battery, clean it first by removing the accumulated dirt and debris
>>> Read more: The Best Method on How to Clean Car Battery Terminals
There are also fewer chances for corrosion to develop, both on the battery and the surrounding metal components. Normally a damp cloth would suffice in cleaning the battery, but if the dirt proves to be more difficult to remove, then you can do the following steps:
If there are general signs of wear such as grime and minor corrosion, you can use a commercial ammonia-based window cleaner. Spray some of the liquid on a clean rag, then rub it on the battery, using paper towels to remove the loosened impurities.
For signs of heavy corrosion, a more effective solution would be to use baking soda and water. Simply some baking soda and water on a flat dish, making sure that there’s just enough water to make a paste.
Then apply the paste onto the battery with a wet rag, following it up quickly with a paper towel to wipe off, repeating multiple times until the battery is clean.
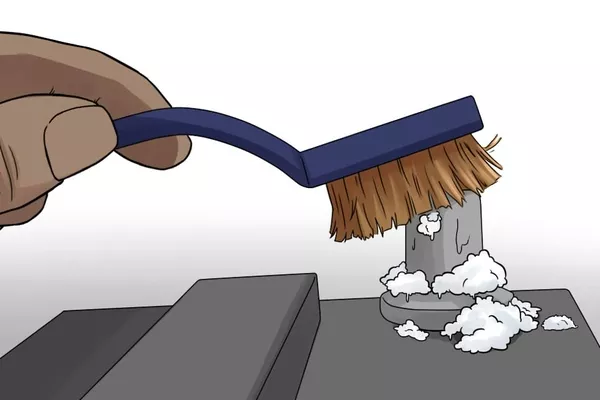
Once you find the battery, clean it first before checking the water levels
You can even add a few sprits of ammonia-based window cleaner to help remove the grease. Once you’re done, make sure there’s no baking soda residue left on the battery. This will hasten the development of corrosion.
You can also remove the terminals from the battery, dipping them in a cup of hot water to loosen the corrosion from the metal. Make sure that the terminals are completely dry before attaching them back on the battery.
For easier cleaning, you can remove the battery from the car first, especially if the engine bay layout makes it difficult to access all sides of the battery.
Step 3. Opening the ports
Once the battery is cleaned, you should be able to see two semi-rectangular plastic covers that seal the battery cell ports. You can remove these by prying them with a putty knife or a flat-head screwdriver. In some batteries, there are six individual round covers. You can remove these by twisting each in a counter-clockwise direction.
If your car battery says “Maintenance Free” on the label, then it’s not designed to be opened by the user. As maintenance-free batteries are disposable, they should be promptly checked at the first sign of trouble, such as unusually hard engine starts.
Unlike regular batteries, maintenance-free ones can completely fail with little to no warning.
Clean the ports as necessary; you will likely find more dirt and corrosion once you open them, so use the window cleaner as instructed earlier. Don’t use the baking soda paste as this may enter the port.
>>> Also check: Will a dead and dying battery destroy your cars’ alternator?
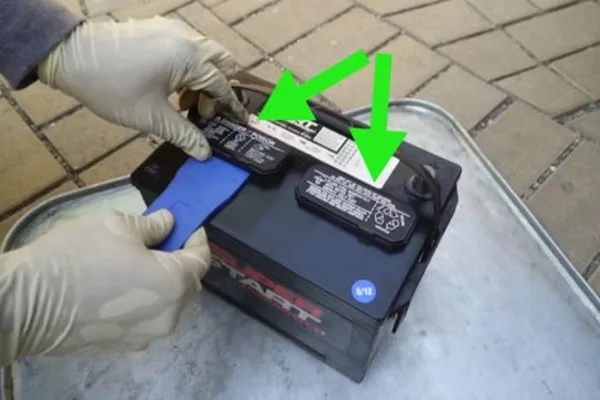
You will see two semi-rectangular plastic covers that seal the battery cell ports
Step 4. Inspect the fluid levels
With the port covers removed, you can now peer down each port to inspect the battery fluid levels. Battery fluid is an electrolyte composed of distilled water and sulfuric acid connecting all of the electrodes within each cell; the fluid levels should be visible when you shine a flashlight inside the battery.
Each of the battery’s ports should have an equal amount of electrolytes. If there is a very slight difference between the ports, it may be from an accidental overfill. This should be easily corrected when the proper filling is done.
If there is a noticeably large discrepancy in electrolyte levels, it could be a sign of a leak caused by a crack somewhere on the battery. If there is no leak, then fill the pot to the maximum indicated safe level, using distilled water only.
Put the battery port covers back and observe the battery again after two weeks to check if the electrolyte levels have remained the same.
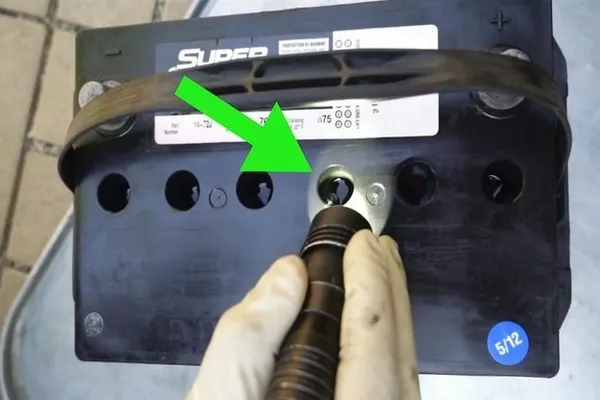
Look down into each port and compare the fluid levels
Step 5. Know when the electrolytes are low
One thing to remember when inspecting battery water levels is recognizing when the electrolyte levels are too low. If the plates inside the ports are not fully submerged in water, then the battery has insufficient electrolytes, compromising the battery’s performance.
Checking battery acid levels
>>> For your information: A driver's guide in choosing the right battery brand in the Philippines.
Keep in mind too that the plates in a particular area can be damaged if they have been exposed to air, which is one reason for low electrolyte levels. If your battery’s electrolyte levels are about half an inch below the top of the plates, you can top it up with distilled water to cover them.
Another reason for a battery’s low electrolyte levels is overcharging. You may need to have your alternator checked to rule this out.
Recent posts
- How Long Do Car Batteries Last: The Numbers and The Factors Mar 01, 2021
- The Best Method on How to Clean Car Battery Terminals Oct 27, 2021
- Is it true that rarely driving means longer car battery life? Mar 30, 2018
- 10 reasons of a weak car battery Mar 17, 2021
- 3 essential things to know about car battery Oct 19, 2020


