Welcome back to part 2 in the series of "DIY Auto Repair tips". Previously, we've showed you 5 most common car problems and how to prepare as well as how to repair a car yourself. Today, we will continue to share some more useful technique for car maintenance.
>>> Read more:
- [DIY Auto Repair] 10 most common car problems & How to repair a car yourself [Part 1]
- 5 easy DIY car repairs to save money
Most common car problem #6: Squeaky Belts
After a long time using, the belt, which brings all the components of the engine together, will have a decrease in quality. You will hear intensely squeaks and cracks every two seconds. That’s the sounds of the moribund belt. What are you waiting for? It's high time for a new belt.
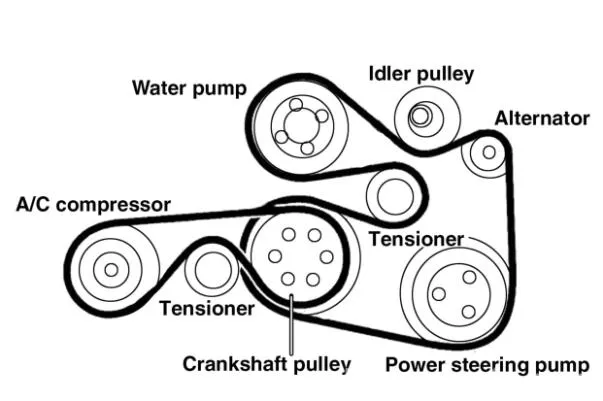
The belt path brings all the components of the engine together
DIY auto repair tips:
- Before you start, ensure to have a belt diagram or whatever helping you keep track of the belt path;
- Then, use a ratchet to soften the tensioners, making the belts easier to take off;
- You can see the pulleys – one of the reasons cause damage for the belt. Check if they wobble, you will need to replace them too. Otherwise, lubricate them with oil to keep rubber down;
- Reroute the new belt according to the map above, make the tensioners tension again and there you go.
How to Fix a Squeaky Belt (figure out where the squeak is coming from)
Most common car problem #7: Dead alternator
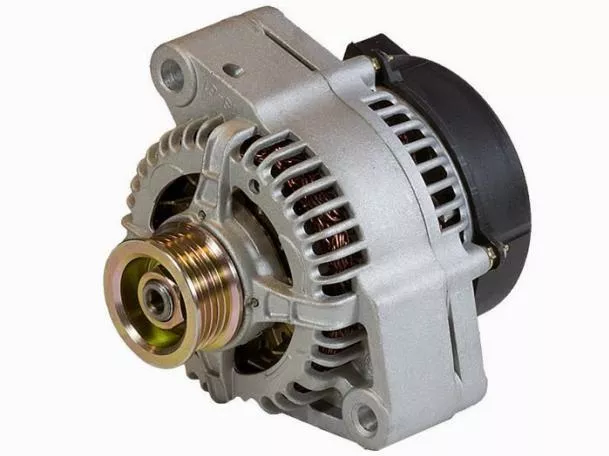
An alternator generates power and spreads them to the entire system
The alternator is in charge of powering up the battery and the electrical system when the engine is running. Basically, this part generates power and spreads them to the entire system. Without this, your car can’t even start. If your car won't start and there is no sign of power, you will have to replace the alternator.
DIY auto repair tips:
- Disconnect the battery. This is kind of important and a little complex. There could be many wires connected to the alternator, but the one you need to focus is the hot one. If you skip through this step, you could possibly get shocked during the process;
- Next, you will have to unplug the wires from the back of the alternator. This sounds simple but if you’re not sure which terminal each wire should go, you can label them to avoid misdirection;
- Upcoming step is a tough mission – removing the belt from the pulley. Find the tensioner pulley – which then you will have to move it a little bit in order to slip the belt out of the pulley;
- The fourth step, remove the bolt connecting to the alternator and to the bracket, you will have the alternator in your hand. That means there’s only half way left. You can now substitue the old alternator with a new shining one. Ensure that every component around are undusted;
- Finally, reverse all the removal steps you have done before. Pay attention to the belt route and tensioning.
>>> Read related articles:
Most common car problem #8: A leaky radiator
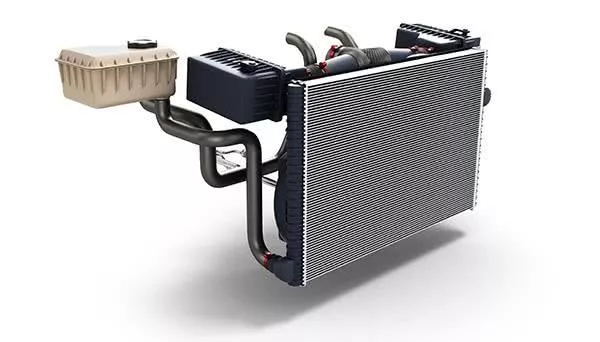
The radiator helps cool down the car engine, preventing it from being overheated
Everything using engine or motor should calorific, so do your car. In order to cool down the engine, preventing it from being overheated, there’s a radiator. You can see it if you lift up the car hood. There are several symptoms you can spot if the radiator is leaking. The radiator uses liquid-based coolant as a heat exchanger. As a result, you can see a bright green or pink puddle on the floor or the driveway. You can also check out the coolant reservoir level. If this level drastically decreases, it could be a sign. These two are the simplest way to indicate a leaky radiator.
The best way to fix is to change an entire new radiator. Don’t hesitate to invest money in this because patching up the issue only slows down the leaking.
DIY auto repair tips:
- Begin by pumping up the car, with the jack, take out the drain bolt below the radiator to remove all coolants;
- Next, remove the tank, disconnect to fans, remove the top radiator hose and take off the top brackets which keep the radiator in place. You may help to also remove the cool line if you have an automatic car;
- Then, put a new radiator in fill it with the 50-50 combination of antifreeze and water or premixed fluid.
Most common car problem #9: Bad Brake Pads
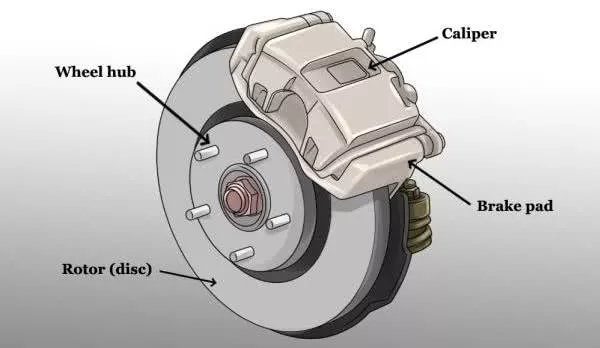
Brake is one of the most important components that construct a car system
Have you ever thought about driving without the brake? That’s an insane thought, isn’t it? Undoubtedly, brake is one of the most important components that construct a car system. That’s why you should properly and frequently maintain this one. Fortunately, you don’t have to spend too much effort for spoting the brake problem. Once the brake is down, there will be so much noises and squealing, you probaly can bear them. So this is how you can remove the bad brake pads. First thing to say is that it’s as hard as what it sounds. Be cool, we’ll be with you from the beginning to the ending of this process.
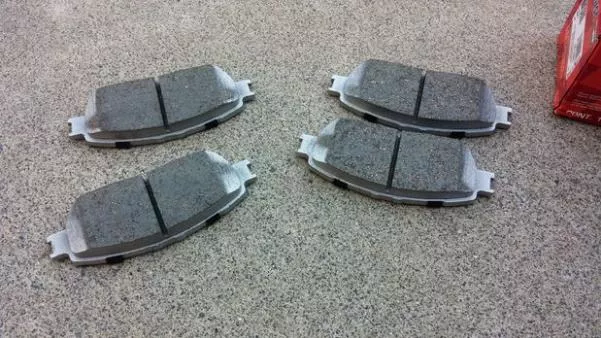
Removing car brake pads isn't as hard as what it sounds
DIY auto repair tips:
- You may have read Part 1 of this series. If you have, we assume you know how to pump up your car and take the tire off. That’s the beginning;
- You should see the brake caliper and the rotor now. With a socket wrench, remove the bolts from the back of the caliper, sliding it off the rotor. You absolutely should not hang the caliper by the brake line. It costs an arm and a leg to buy a new brake line;
- There, you can disengage the brake pads out of the rotor. Be careful not to cause any damage to the clips or the rotor itself. You may consider reusing them. Another thing, as you remove the brake pad, keep track how they are arranged. You will find it much easier to bring them to the original position;
- Now that the bad brake pad has been removed, fit the new one in. Lubricate the back of the brake pad with a small amount of grease. Why not the front? Well, the brake is all about the friction between itself and the rotor. Spreading grease on the front of the brake pad is obviously against the aim of the work. As a result, you could put you and your car in danger;
- Replace the caliper assembly;
- Finally bring back the tire, tighten the lug nuts and bring the car back to the ground.
Done, feel arduous yet?
>>> Related post: How to make your brakes last longer?
Most common car problem #10: Replace side-view mirrors
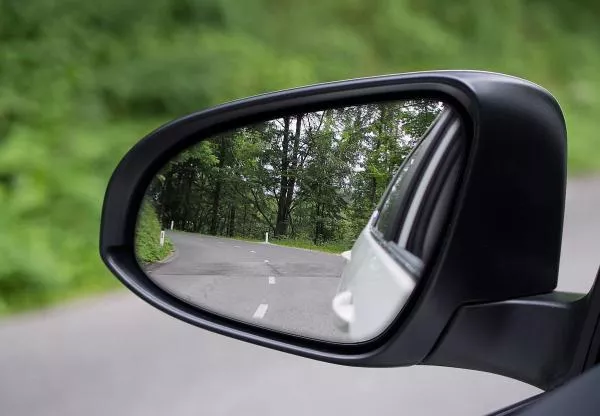
Mirrors help drivers have a better rear view
Most of cars today are equipped with two side-view mirrors. For the reason of safety, they give you an improvement of visibility to the rear. In some cases, they could be broken due to drive-through or when you move out of the garage. Lucky for you, it not required much effort to have it fixed.
DIY auto repair tips:
- The hardest step is to find and unscrew the mounting screws and clips that stick the mirrors to the door. Once they’re removed, the remaining is quite simple. These could be located in the areas such as the bottom or the recess of the door handle, covered by some plastic pieces or caps. Prying those caps to let the screw exposed.
- There is also a panel which cover the mounting of the mirrors. Remove the screws holding this panel. And also remove the door panel with the same technique. After the panel is removed, disconnect the electrical connection to the mirrors.
- To install the new mirror, you just simply reverse all the things you’ve done to disengage the old ones, nothing more. And that’s how you replace the mirrors
Congratulations! So now you have known well which the most common car problems are as well as how to repair a car yourself. We hope you enjoyed and found helpful maintenance tips through the series. And as always, safe driving, drivers!


