You may be wondering why you would need to learn this when you can just go call your old friend Bob at the mechanics. There’s nothing wrong with leaving things up to the experts and spend a few bucks to have them replace it for you.
However, if you feel like those extra bills that you can hand over to old Bob will be more useful in your hands, you can always opt to do the brake-changing operation by yourself. Whether you’re new to it or you already know what you’re doing, our step-by-step tutorial here will provide you with just what you need.
We laid out the process and also added in a few tips for portions where you may get confused. So go ahead and study these DIY steps to changing your brake pad brough to you by Philkotse.com. It won’t only save you a couple of bucks but you’ll be able to learn something new too!
How to Replace Front Brakes, Pads and Rotors
>>> Also read: 6 signs showing that your car's brake system needs maintenance
1. Shop for your brake pad replacement
These are available at your local auto shop or even at the old mechanic's place. They can come at different prices so you better know what you are looking for. Don’t forget to inform the store clerk of your car’s make, model and year. They should be able to offer you a few options from varying brands and price ranges. It's general knowledge to assume that the expensive ones are of the higher quality and this is actually true most of the time.
Here are a few tips:
- You may be tempted or the store clerk may introduce you to higher priced brake pads that are made for rally cars. The clerk may tell you that this is higher quality material or so, and this is true. However, if your rotor isn’t as high in quality then it might sustain damages.
- Cheaper brake pads that are substantially less expensive than those with famous brand names are often described as noisy. This is compared to those with quality brand names that have less noise when used.
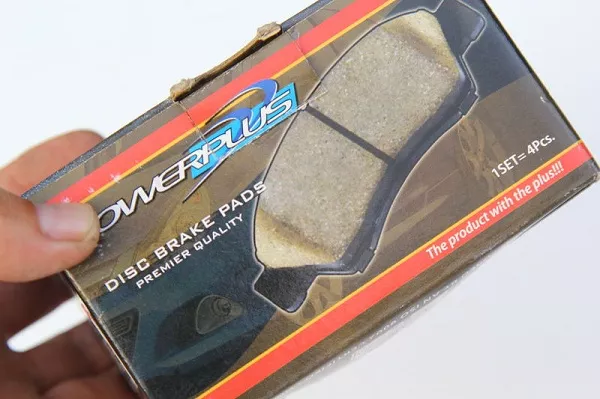
It's general knowledge to assume that the expensive ones are of the higher quality and this is actually true most of the time
2. Let it cool
Make sure the car is cooled down and the parts that you’ll be touching are also cool to the touch. If it is too hot, then set the changing procedure at a later time. After all, it’s better to have your brake pads replaced next time than to replace it at a time when you can risk burning your fingers off.
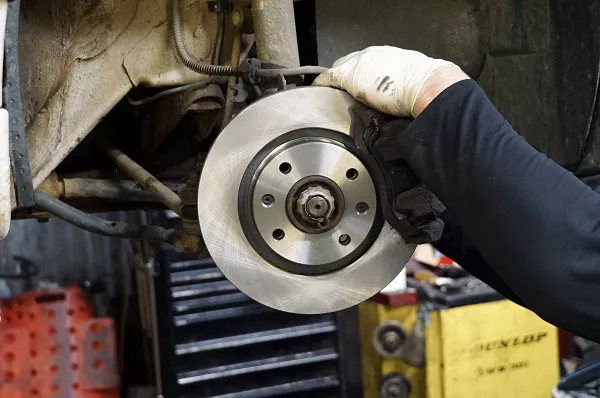
Make sure the car is cooled down and the parts that you’ll be touching are also cool to the touch
3. Loosen the tire’s lug nuts
Use your lug wrench to loosen the lug nuts. Don’t loosen all the lug nuts all at once and then you can jack up the car soon after. Put blocks in front of the other wheels so something would stop it from rolling.
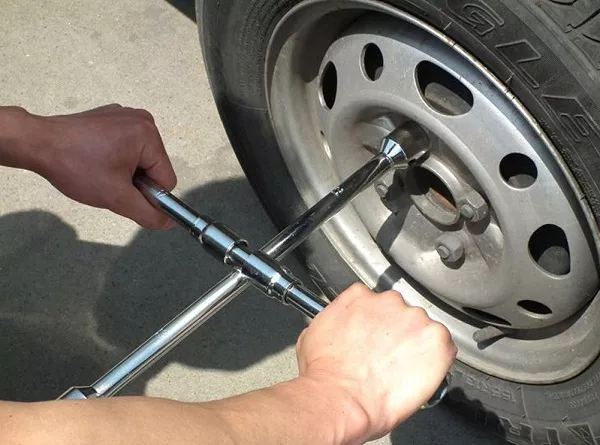
Use your lug wrench to loosen the lug nuts
>>> Related: What are brake pads made of and what’s the best material?
4. Remove the wheels
Jack up your car according to the correct measurement as indicated in your manual. The correct position can also be found in the car’s manual so be sure to look for it as a reference. Once your car is raised safely at the right angle, you can now start finishing the lug nuts that you started unscrewing earlier. After doing it correctly, you should be able to easily pull out the wheel towards you.
5. Remove your car’s caliper bolts
The caliper is the part that hugs the rotor like a perfectly-fitted clamp. Its job is to slow the wheel down every time you hit the brakes using a systematic use of hydraulic pressure. Calipers will come in two types and you would be able to check this once you take it off. Some calipers are a single piece while others come in two-piece designs.
To properly remove your car’s calipers:
- Look for the bolts or screws that hold the calipers on to the rotors. Spray them with either WD-40 or a PB Penetrating Catalyst to help you remove them with ease.
- If your car is from a Japanese manufacturer then there is a good chance that your car was built with sliding calipers. This caliper will consist of two pieces and you will only need to remove two slider bolts. These can be 12 to 14 millimeters in head circumference thus, disabling the need to remove the entire caliper.
6. Hang the caliper safely
Once you successfully remove the caliper it should still be connected via a thin wire to the main brake line. So find the caliper a safe spot to be hung or to be placed on while you work on the brake pads. This will inhibit the tugging weight of the caliper to endanger the brake hose.
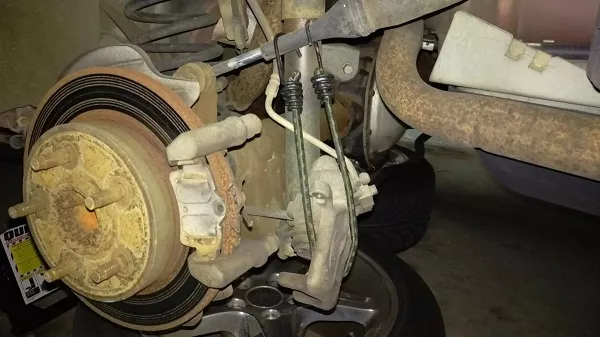
Find the caliper a safe spot to be hung or to be placed on while you work on the brake pads
7. You can now remove the old pads
Now that you’ve gotten all pass that, it’s now time to remove the old pads. They are fairly easy to remove once you snap off the metal clips that are attaching it. If they are harder to remove, don’t be afraid to use a bit of elbow grease.
8. Put on the replacement pads
To avoid any annoying squeaking sounds, apply some anti-seize lubricating product over on the contact edges as well on the back of the new brake pads. Remember to not get this lubricant on the inside of the brake pad or else the whole procedure will be useless. You can now attach the new pads and follow the procedure in reverse to put everything back together.
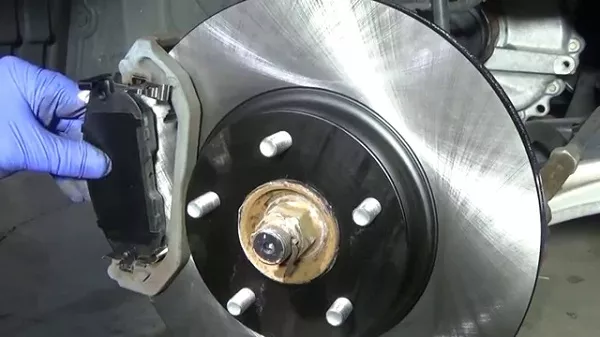
You can now attach the new pads and follow the procedure in reverse to put everything back together
9. Do a brake fluid check-up
Take a quick check on the brake fluid. If it’s below the indicated line, top it off immediately. Don’t forget to put the cap on after.
10. Finishing touches
You can now put the caliper back on the rotor as well as screw the wheel back on. Remember to use your hands to tighten the lug nuts first before you completely lower your car. Once you lower the wheel and remove the jack, you can now tighten the lug nuts thoroughly using a lug wrench. Tighten the nuts as if you’re attempting to draw a star when you were in elementary. After that, your car should be good to go.
>>> Get more useful tips and advice for your car maintenance here
Recent posts
- Car handbrake: Things you should keep in mind Apr 12, 2021
- How to use your car brakes properly Nov 07, 2018
- These 7 habits of car owners are awfully damaging their brakes Mar 17, 2021
- Do’s and Don’ts when car brakes fail Mar 17, 2021
- How to make your brakes last longer? Feb 17, 2021


