Ever wonder how your transmission sends power to the wheels? Sure, there’s the driveshaft but how do you think that is linked to the axles? That’s right – those two parts are linked using universal joints or U-joints. But, what are they really? How to install U-joints? How to replace a universal joint? Let's check out with Philkotse.com.
What are U-joints?
If you’ve ever taken a peek on the underside of a pickup truck, an SUV, or any rear-wheel-drive, or four-wheel-drive vehicle, you might have noticed that the driveshaft isn’t exactly connected to the axles at 90 degrees. That’s because if it did so, the movement of the shaft will cause oscillation, which will then cause “launch shudder” among rear-wheel drive vehicles.

Pickup trucks like some variants of the Toyota Hilux are rear wheel drive so they make use of driveshafts
As mentioned, U-joints link driveshaft to the axles. This angled shaft also allows for the axle movement in the case of the suspension system reacting to terrain, without snapping the said shaft.
>>> Related: A summarized guide to all of your car parts & functions
The universal joint, U-joint, or Cardan joint, was first introduced in 1545 by an Italian mathematician by the name of Gerolamo Cardano. In his writings, Cardano mainly explored the idea and design of the gimbal. It wasn’t until the 18th century however that people began to use the term “universal joint” when they extensively used it for a great many machines like the steam locomotive.
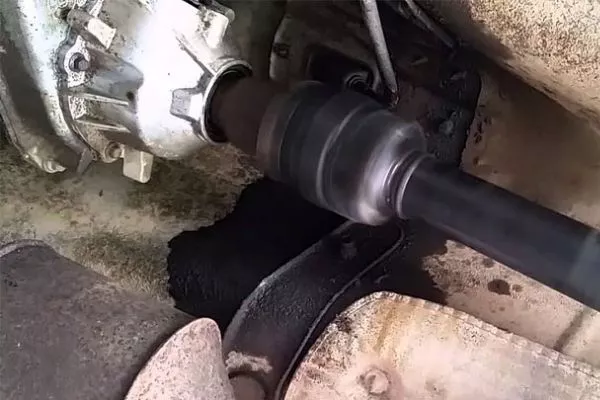
This is a spinning driveshaft. Note how it isn't exactly straight. That's thanks to the u-joint
Now, despite all the improvements done to the universal joint over the years, it still suffers from the same problem: when the angles between two shafts connected by a U-joint increase, the difference in rotation speed also increases. This results in more vibration, therefore more wear and tear for a u-joint.
Symptoms of a U-joint problem
When it comes to detecting whether a U-joint has a problem, you have to remember that this is a crucial part of a car. With it damaged, it might cause accidents especially if you just continue on driving.
So, if you hear a clicking noise whenever you turn your car, a change in U-joints should be done. If you hear a loud clunk when shifting into gear or shifting into drive, pull over and do a visual check.
If you hear loud banging or scraping metal, then the driveshaft has already separated from its universal joints so stop your car safely, and call a tow truck.

Of course, the worst case scenario is something like this
If you simply want to check if it’s the right time to replace a universal joint, then aside from the visual check, you can also try prying the joints with a steel bar and see how much they’re moving. If it feels too tight, it might need greasing, if it’s too loose, then the bearings inside the joint might be worn.
How much to replace a U-joint?
If you want to simply have someone repair the broken u-joint, then we suggest going to Banawe, Quezon City which is home to a lot of parts stores and mechanics.
Now, typically, U-joint repair cost will be around the range of Php 2,000 to Php 3,000 depending on the make and model of your vehicle.
The labor costs of having it replaced also varies a lot, though we’re not exactly sure how that’ll cost you.
Car designs, after all, have a great variety to them, and of course the same goes for the size and weight of a drive shaft, the vehicle itself, and how accessible the U-joint is.
>>> Related: Car maintenance & repair: How to have it done in Banawe Street
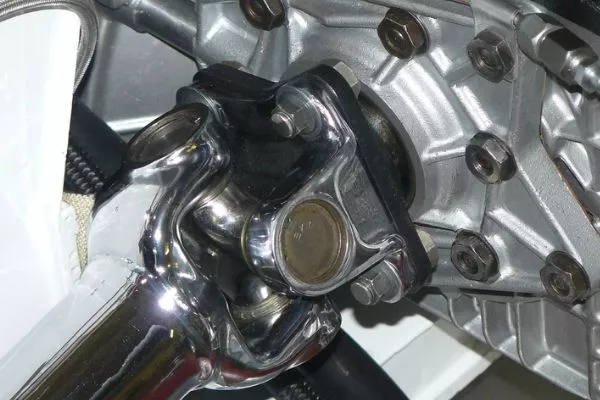
Note that there are some more expensive u-joints that are made for high performance vehicles
If you want to keep the costs of repairing a U-joint low, however, you might want to do it yourself.
Here are some steps on how to replace a universal joint;
How to install a U-joint?
1. Proper preperation
Park your car somewhere flat. Make sure to leave the transmission on neutral. Also, you need to raise the vehicle, so be sure you’re using jack stands.
2. Removing the driveshaft or half-shafts
Before you start removing the bolts, you should mark the orientation of the shaft in relation to the differential flange and the transmission as it’s important to re-install the shaft along with the new U-joint in the same position. This is because a driveshaft has a specific center of balance which enables it to spin right. What if you don’t mark them? Well, your vehicle will suffer from a lot of vibrations as a result, not to mention more wear and tear for your newly bought U-joint.
3. Disconnect the U-joint
U-joints are typically held in place with external clips, which you need to unfasten with needle-nosed pliers. On other U-joints, it’s linked up to the shaft with a C-clip which is found on the U-joint flange itself. To remove this, use a flathead screwdriver, which you will then hammer on the end of a C-clip to make it expand. Also, having a clamp for this step is important because you do not want the shaft to be rolling around while you’re working on it. Do note though that you do not want to clamp on the shaft itself so instead – clamp it on its end near the u-joint.
For actually removing the U-joint, you’ll need to hammer out the old one gently, specifically on the yoke’s hole. If you have a C-clamp (can be brought in any hardware store), then it's as easy as clamping it on said yoke hole and pressing. And lastly, lubricants like WD40 will do wonders for you.
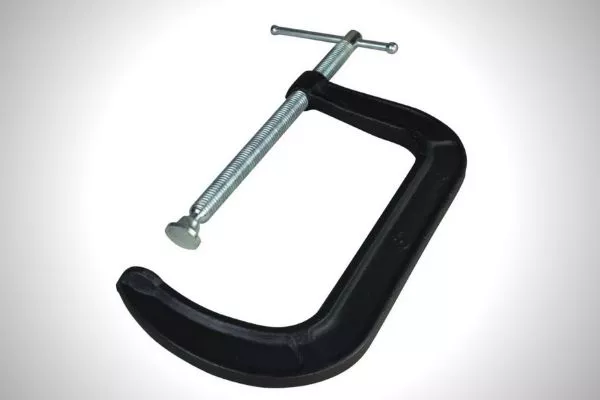
Here's what a c-clamp looks like
Once the C-joint cap is out, twist it with pliers. Flip the shaft over and do it on the other side.
4. Clean the retaining clip
As this is a part that’s always moving, you want to clean out the grease that’s left on the retaining clip. Also, you want to check if the holes where the u-joint flange slips into have burs. If there are any, you’d want to file those out to prevent damaging the new u-joint. Do not file the inside of the said hole, only do this for the edge.
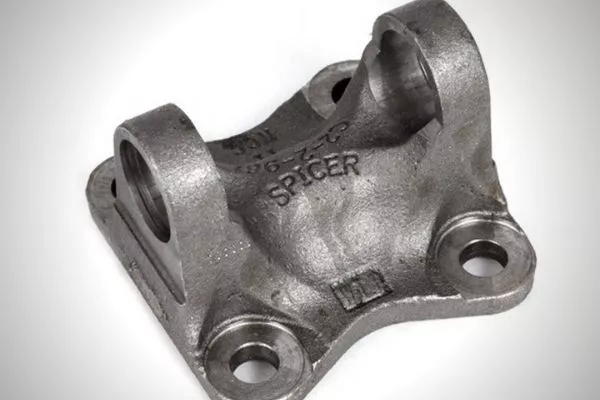
The driveshaft flange that holds the u-joint in place
Do the same for the flange.
5. Install the new U-joint
First, remove opposite caps. Check the needle bearings. If the needle bearings are standing up, press them down. Next, slide the U-joint into the flange, add the cap to both opposing sides and make sure these go in straight.
Apply the press (C-clamp) to press each U-joint cap in. And lastly, do these steps for the other opposing sides of the U-joint. Also, don’t forget the clips holding the U-joint to the flange.
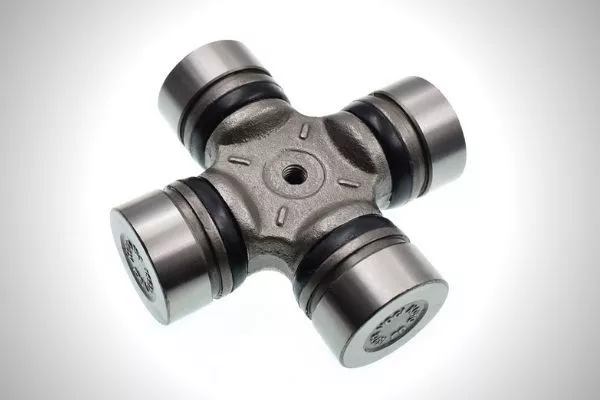
A new u-joint doesn't have grease so don't forget to grease it up
6. Reinstall the shaft and go for a test drive
With the new U-joints installed, re-install the driveshaft just the way you removed it (hopefully you marked it) and tighten the bolts to spec. Also, don’t forget to clean the flange before attaching it to the differential.
When doing the test drive, make sure to listen to your car and pray that there aren’t any weird noises from the driveshaft.
Did this guide cover everything you need to know about U-joints? If it did, keep reading here on Philkotse.com for more helpful guides like this one.
Recent posts
- Preventative maintenance 101: Make sure you know it all Jan 02, 2020
- 5 RWD sports cars with manual transmission priced under $15,000 Oct 20, 2022
- Will the limited-slip differential give a better performance for cars? Nov 08, 2022
- 7 common problems with the car’s driveshaft Jul 11, 2019
- 3 important milestones for new car maintenance schedule Oct 22, 2020


